
2024-Current Lexus GX550 Fender Flare Kit Installation Guide


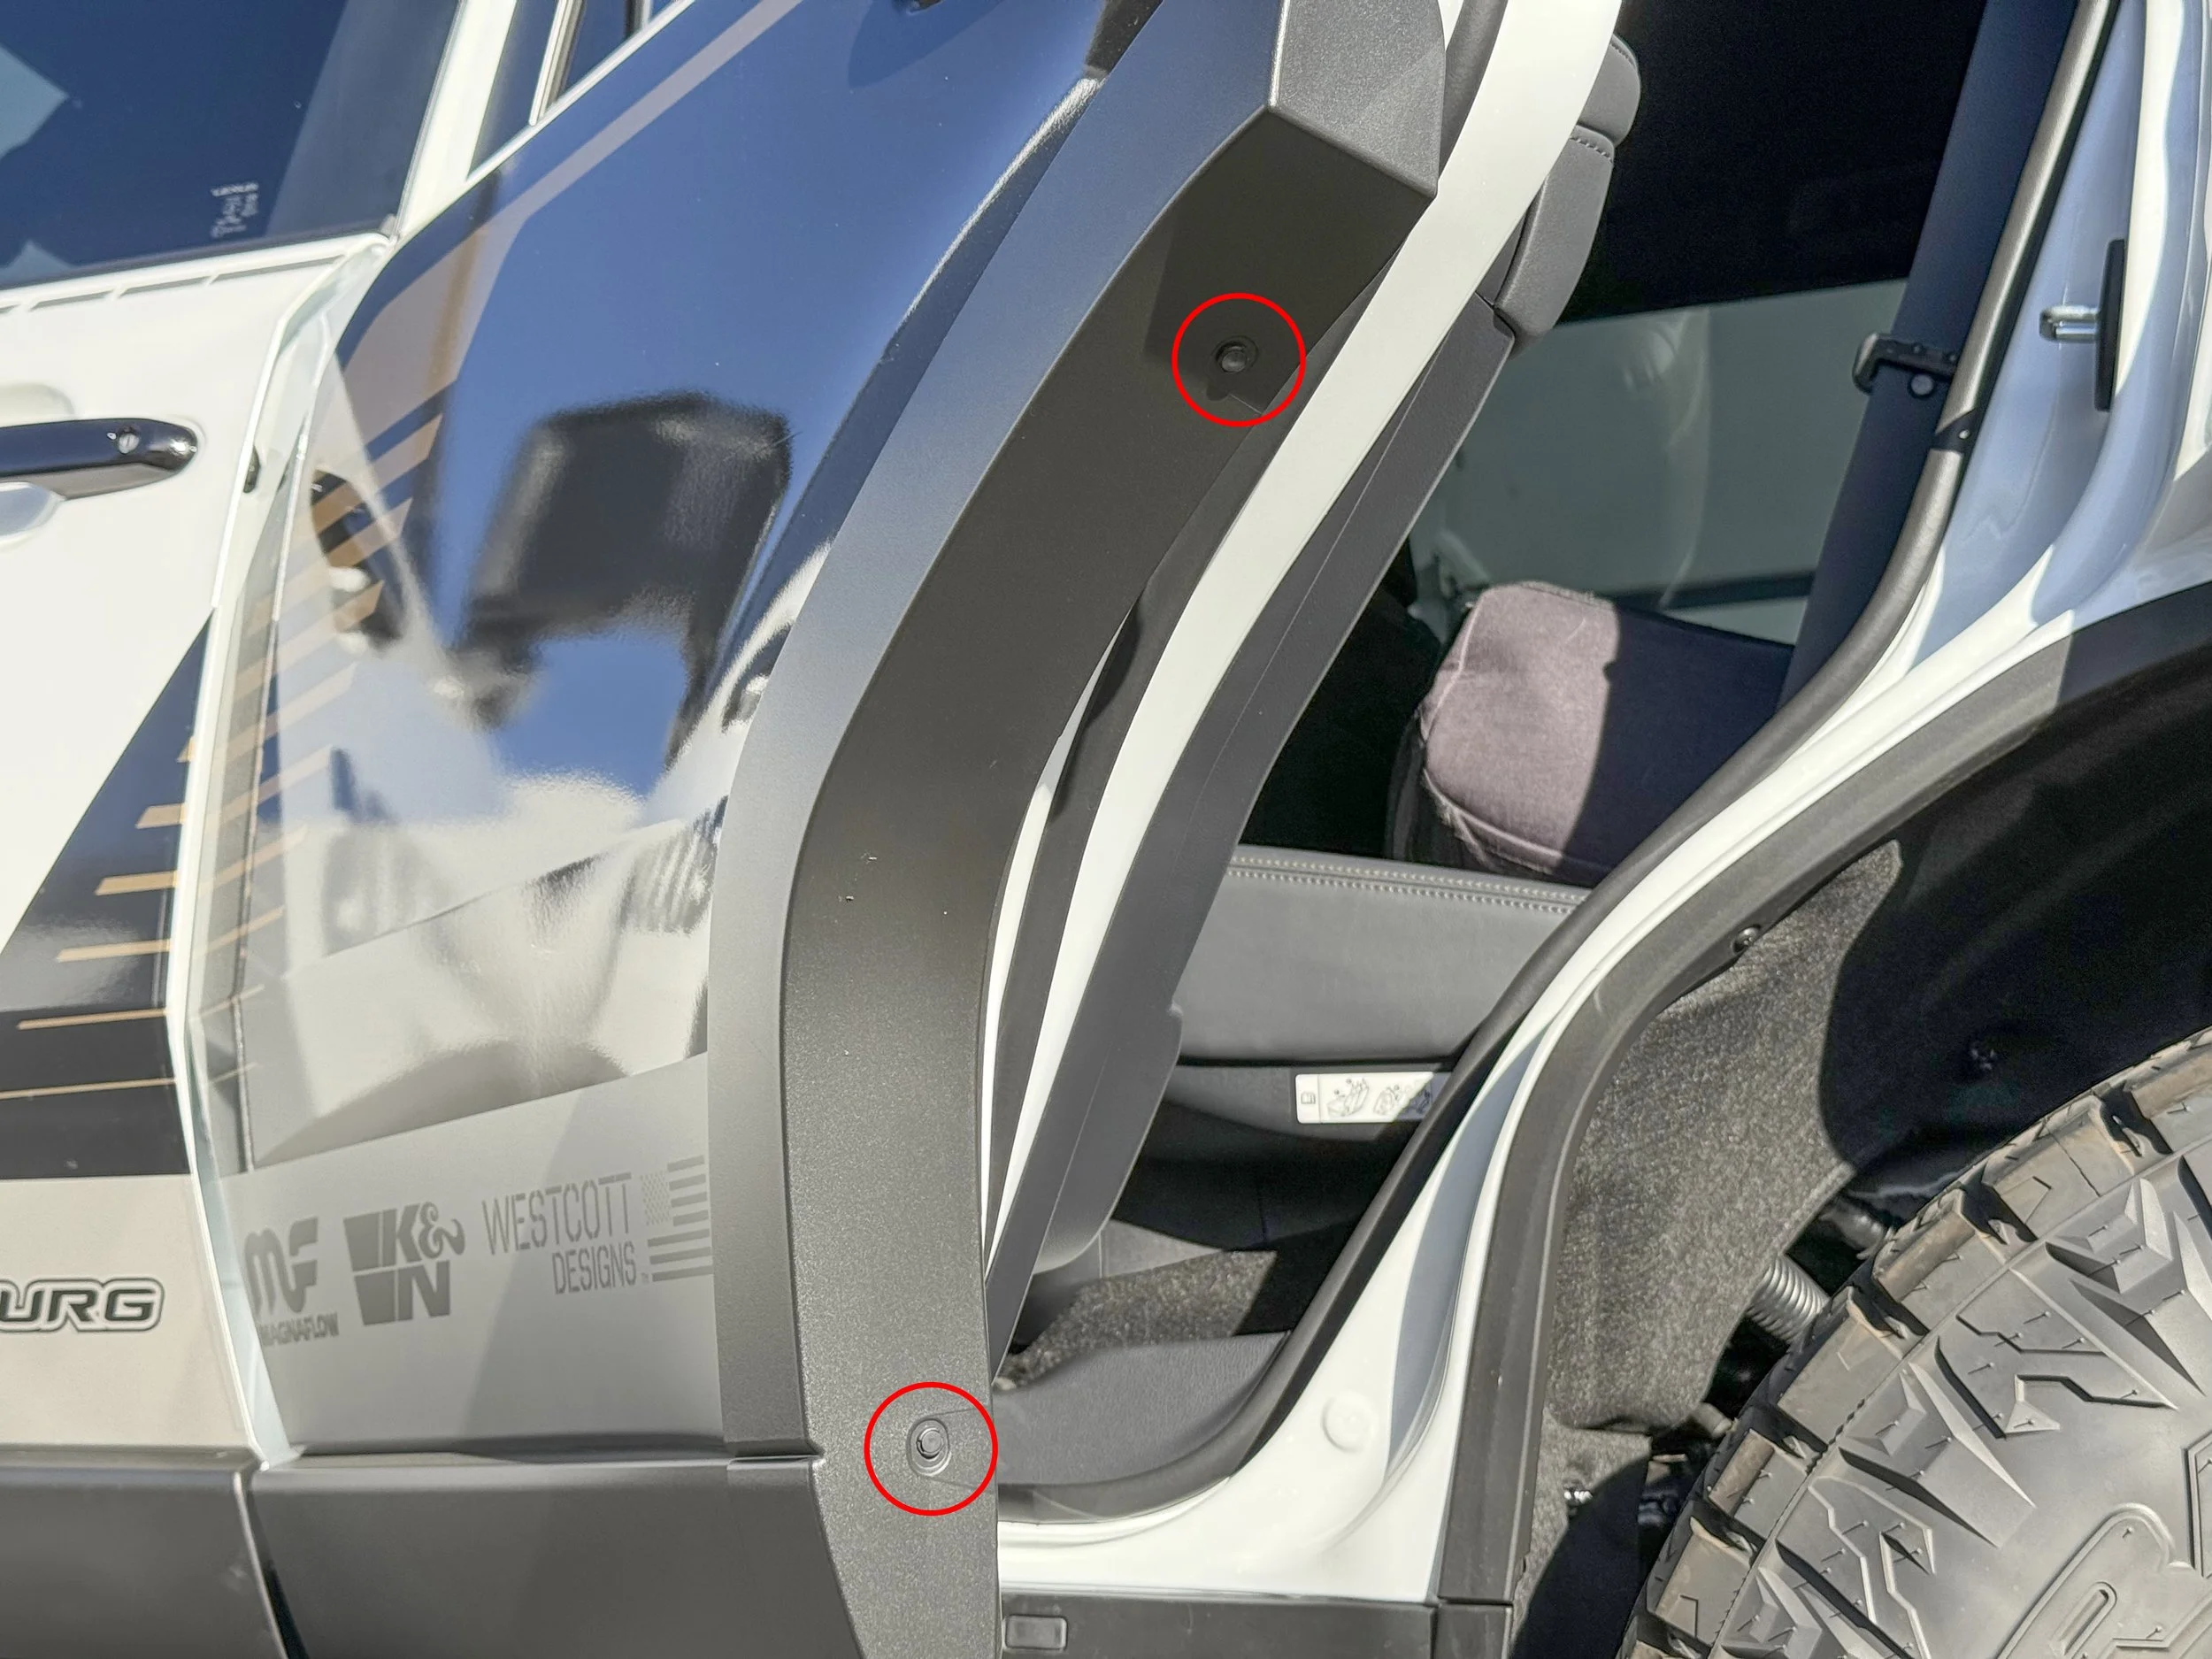
Before the installation, remove the factory fender flares by removing all push pin clips and bolts in the wheel well as indicated, and pulling on the fender flares to release all the clips on the back side.
Front fender flare shown.
Rear door fender flare shown.


Rear fender flare shown.


Apply 1 layer of the 3M™ tape to the back side of the fender flares, as shown in the picture.
Insert the plastic clips into each slot on the back side of the flares. The white clips go onto the front two flares, and the yellow ones go onto the rear flares. Double check that all the clips are fully seated into their slots on the back side of the flares, use a drill to clean up the slot if needed.
We recommend applying adhesion promoter on the back side of the flares before installing the 3M™ tape to help with better adhesion.
Make sure to thoroughly clean the paint with Isopropyl alcohol.
Optimal surface temperature for the 3M™ Super Strength Molding Tape is above 65°F (18°C).

Next, peel off only an inch of each end of the tape and leave the backing as shown in the pictures. Then line up each fender flare to the body panels by the yellow clips and make sure that the push pin tabs are sitting below the wheel well liner like the OEM flares.
Peel off the backing of the tape and apply even pressure to clip the fender flares in place and bond the fender flares to the body panel.

Finally, reinstall all the OEM push pin clips and bolts back into their original positions.
Enjoy the added protection and improved aesthetics to your vehicle!
