2024-Current Lexus GX550/Toyota Land Cruiser Ditch Light Mount Installation Guide


A preview of the Ditch Light Mount assembly.


Before the installation, remove the OEM plastic trims on each end of the cowl area.
Start by removing the lower trim, which can be unclipped horizontally.


With the hood open, remove the cowl end piece by lifting from the front and unclipping the top portions. Then, unclip the two bottom clips as shown in the picture.

Picture showing the back side of the cowl end piece.


Remove any leftover clips, and place them back onto the parts that they came off of.


Remove the clip holding the washer fluid hose on the driver side (U.S. spec), and move the hose aside.
Remove the M6 bolt holding the fender to the hood hinge bracket.

A preview of all the parts (only one side shown).


Insert the provided M6 bolt from the back side of the hood hinge bracket opening. Install the provided bracket with M6 nut, and the OEM M6 fender bolt, as shown in the pictures.


A preview of our fully reversible, patent pending Not Your Typical Blind Fastener.
Note that one has a longer stud than the other.


Inset our blind fasteners into the two square slots in the cowl, like shown in the picture. Make sure that the longer blind stud goes into the rear square slot on the cowl.
Turn the stud until the bottom rectangular part is perpendicular to the slot, and pull up the stud while tightening down the top nut to lock each blind fastener in place.
Be careful NOT to overtighten the nut.
An animation video of how the blind fastener works.


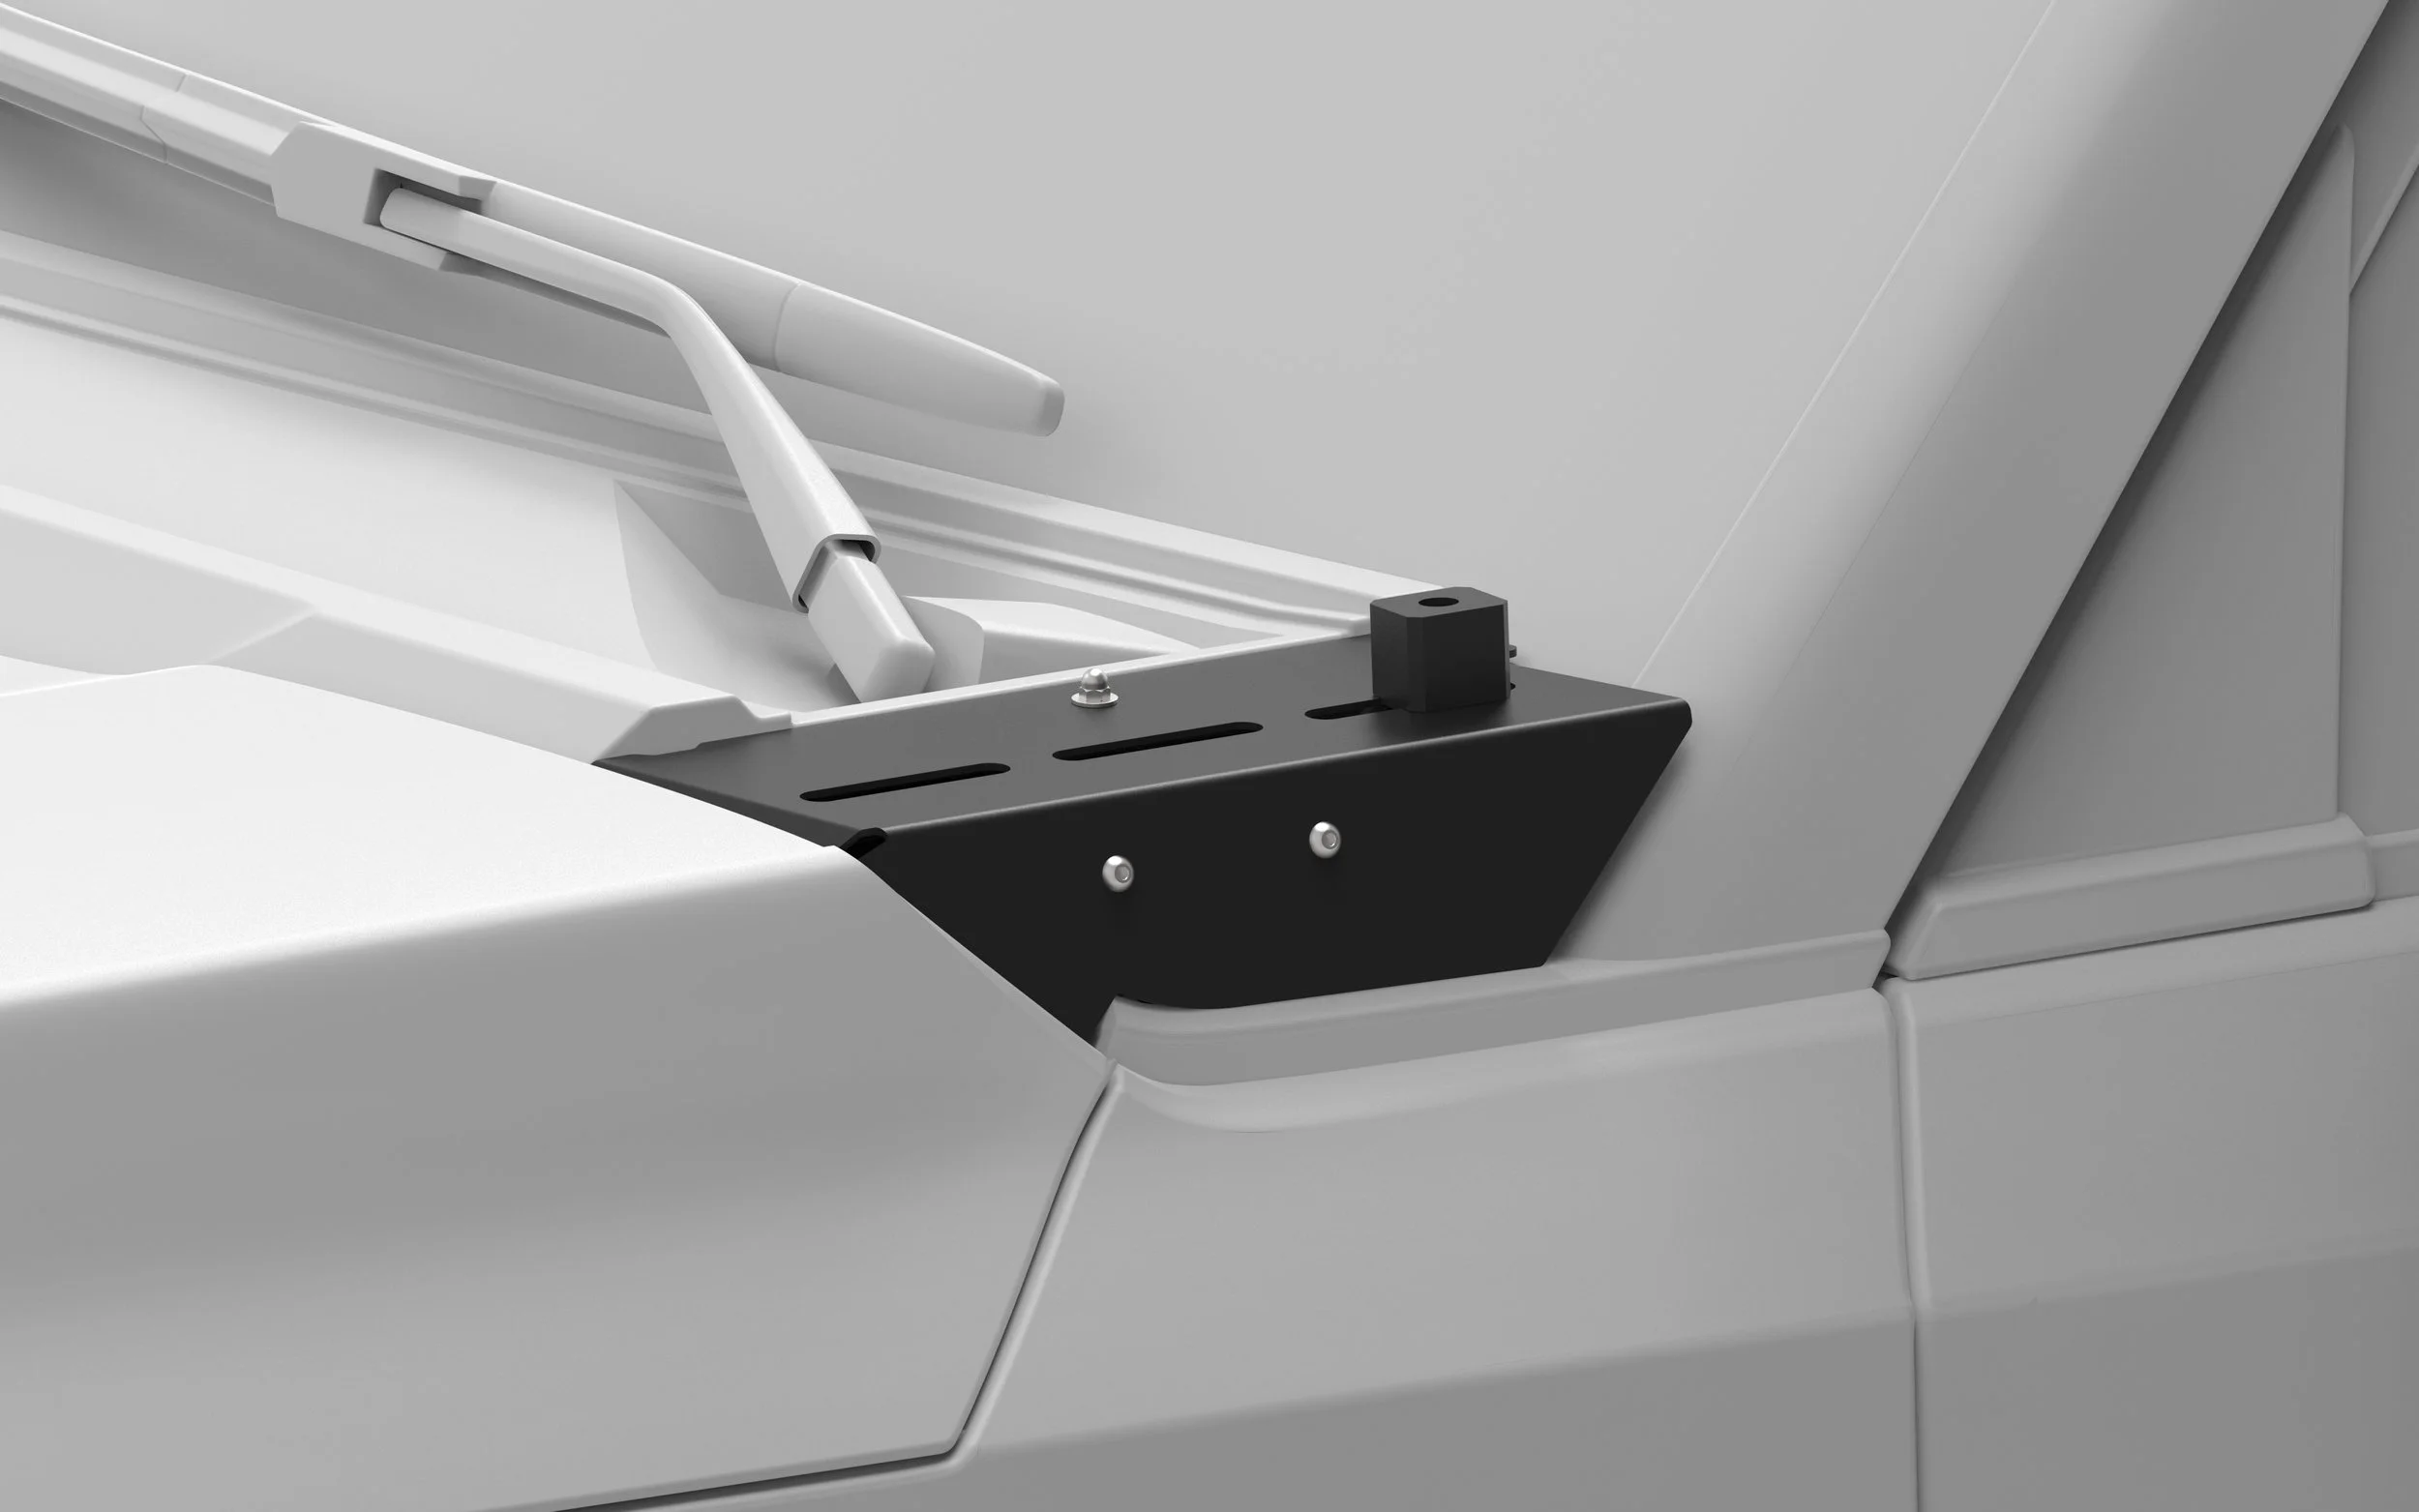
Before installing the top plate, mount the lights with the provided mounting block, as shown in the picture.
Note that the top plate is slanted, make sure to install the mounting blocks in the correct direction to counter the angle of the top plate.

Secure the top plate with two socket cap screws on the side and two hex cap nuts with washers on the top.

Reinstall the lower plastic trim and the installation is complete.