2024-Current Toyota Tacoma Front Hybrid Bumper Installation Guide


For this installation, the front bumper needs to be removed.
First, remove the intake air duct by removing the 4 push pins as shown in the pictures.
To release the push pin, simply push down on it (like the one on the left in the picture). You will need to push the tab back up before reinstalling the push pin later (shown on the right).
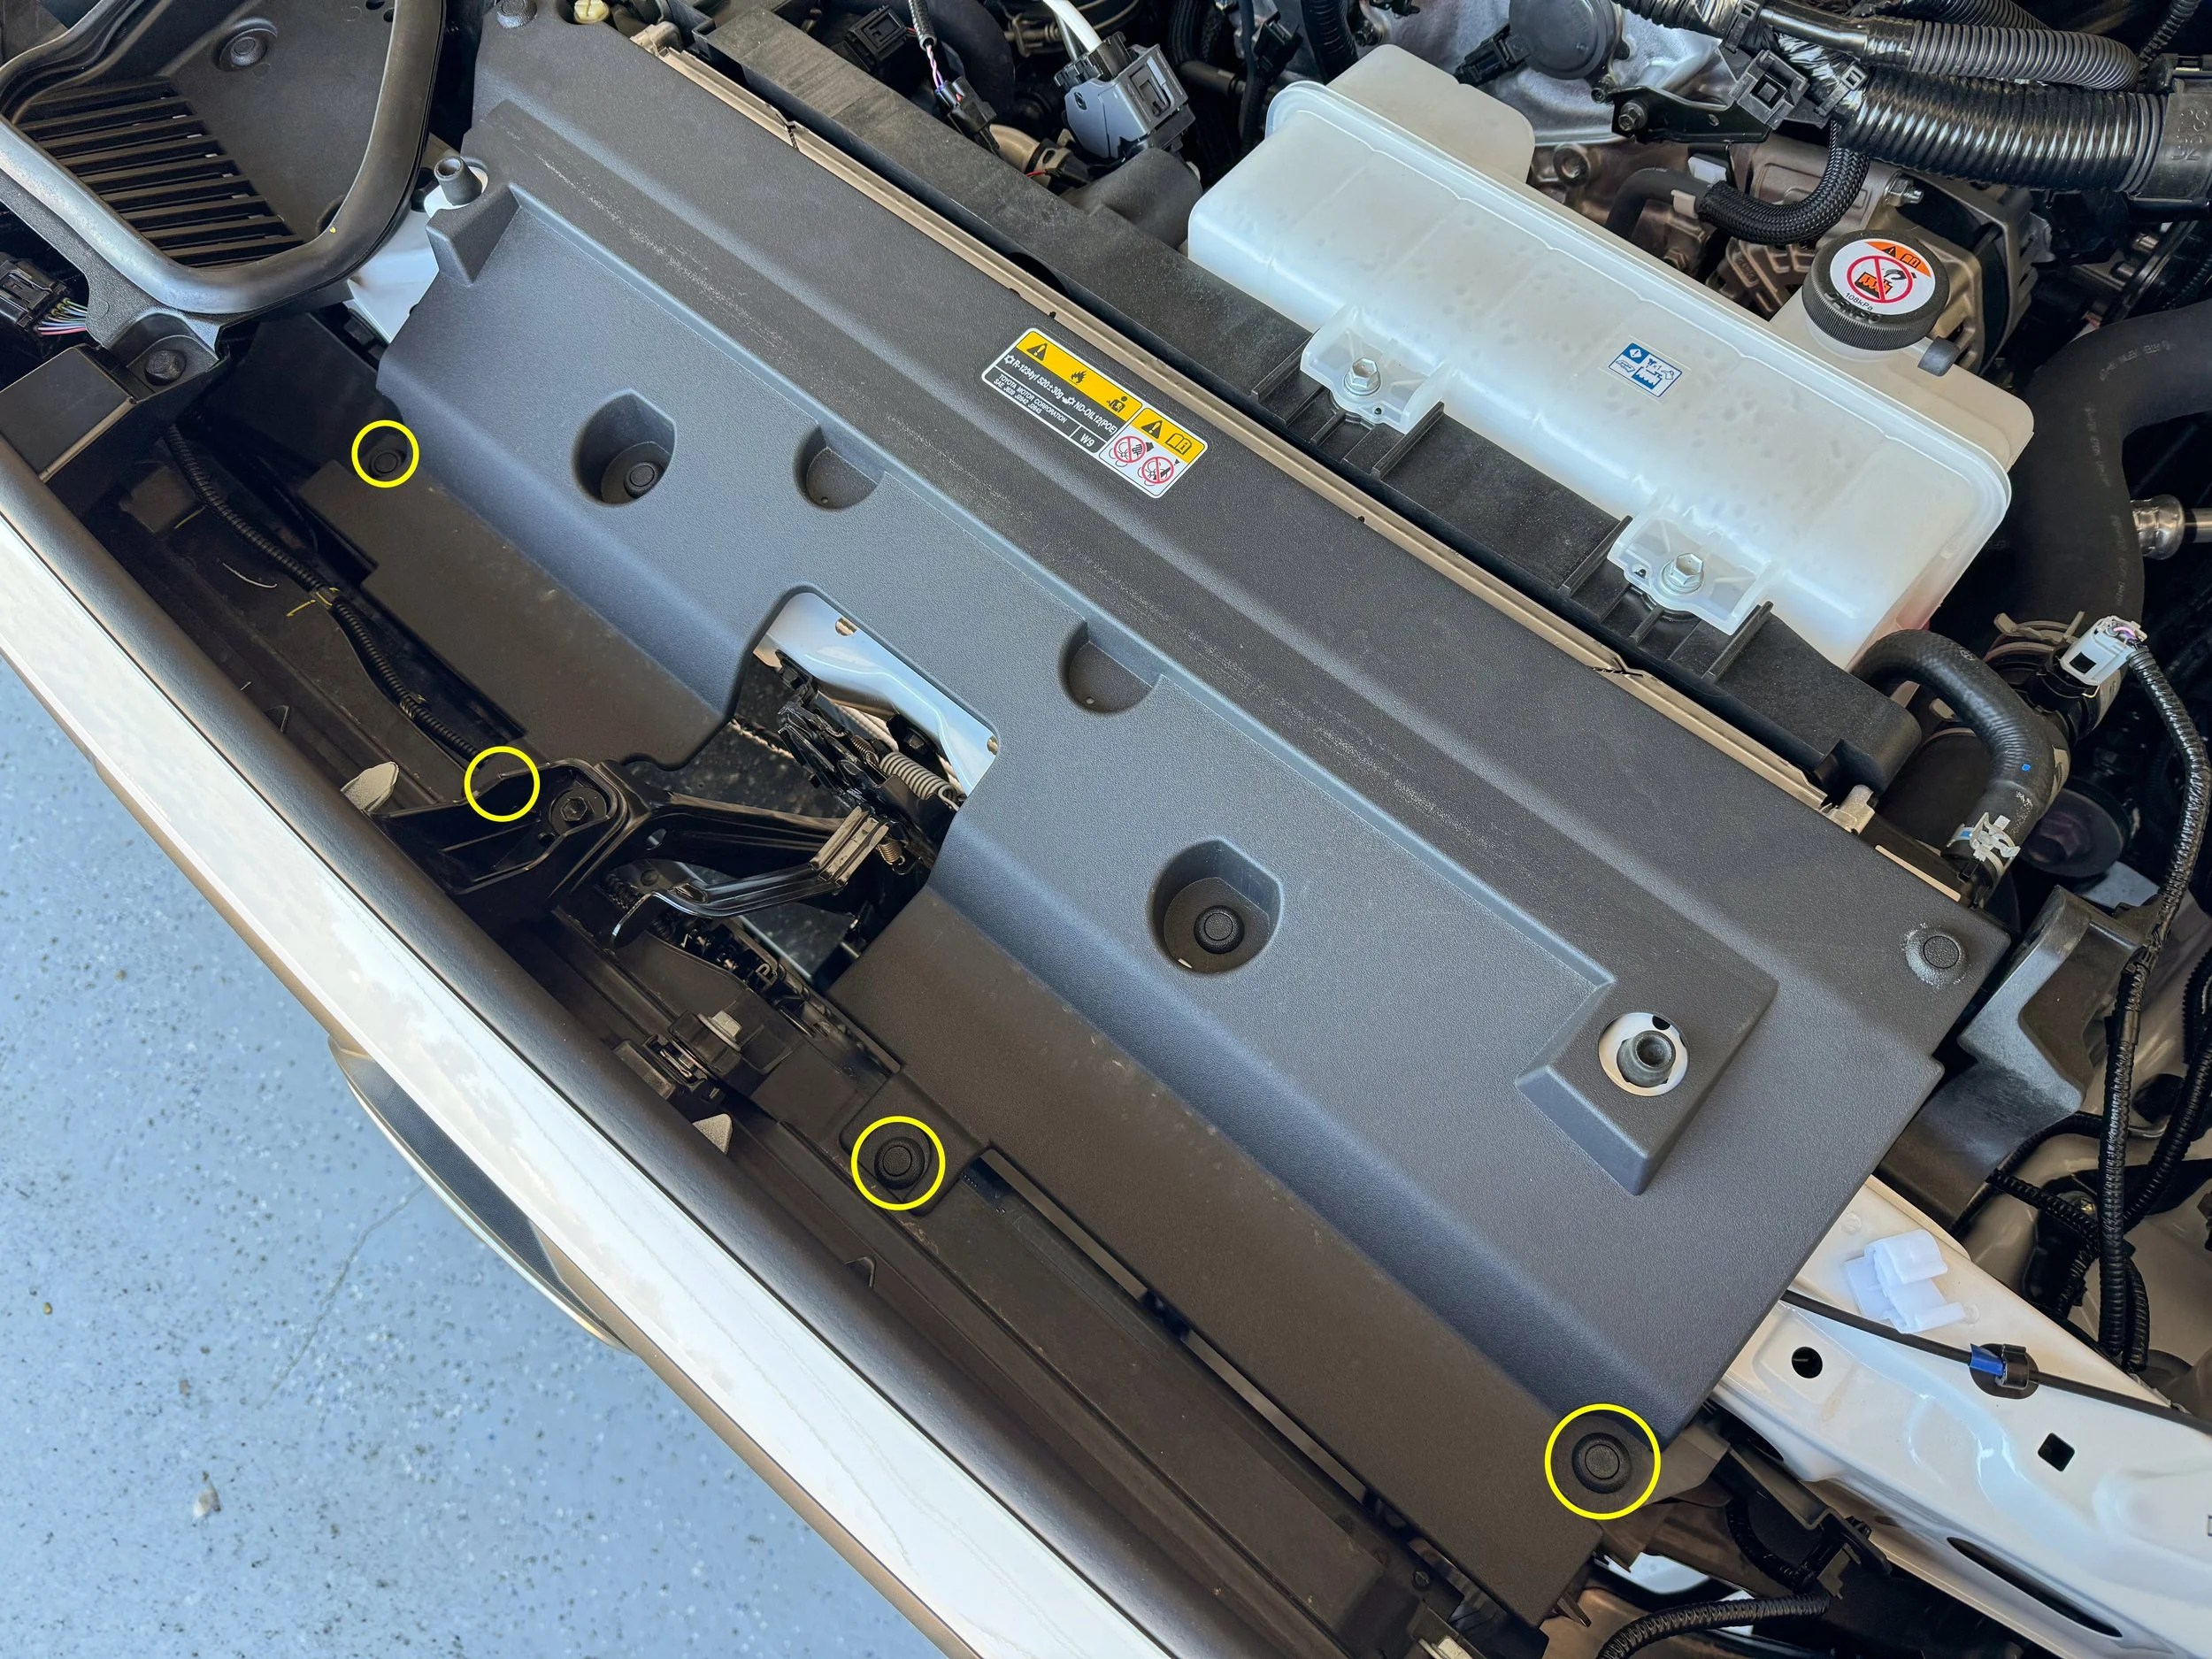

Next, remove the front 4 push pins on the radiator support cover, 3 bolts (10mm) holding the upper grill, and disconnect the 3 wiring plugs shown in red.


Now remove the 2 bolts (10mm) and 2 tabs (shown in red) on the front of each front fender flare. For the 2 tabs, turn the pin counterclockwise and pull them out, to allow the tabs to slide out with the wheel liner.
Remove 2 bolts on top of each front fender flare if equipped.

Pull the front of the front fender flares to reveal a phillips-head screw on each side. Remove the screw.


Remove 2 bolts (10mm) on each bottom side of the bumper holding the wheel liners, and 2 bolts in the middle. Now the front end is ready to be removed.


Lay the bumper on a soft surface to avoid scratches on the paint.
Remove 10 phillips-head screws (shown in yellow) and release 16 tabs (shown in red), in order to remove the lower valance from the front bumper cover. You will have to lift up the fog light trim slightly to allow the lower valance to come off.

Push the fog light trim back in place, and reinstall the 5 phillips-head screws.


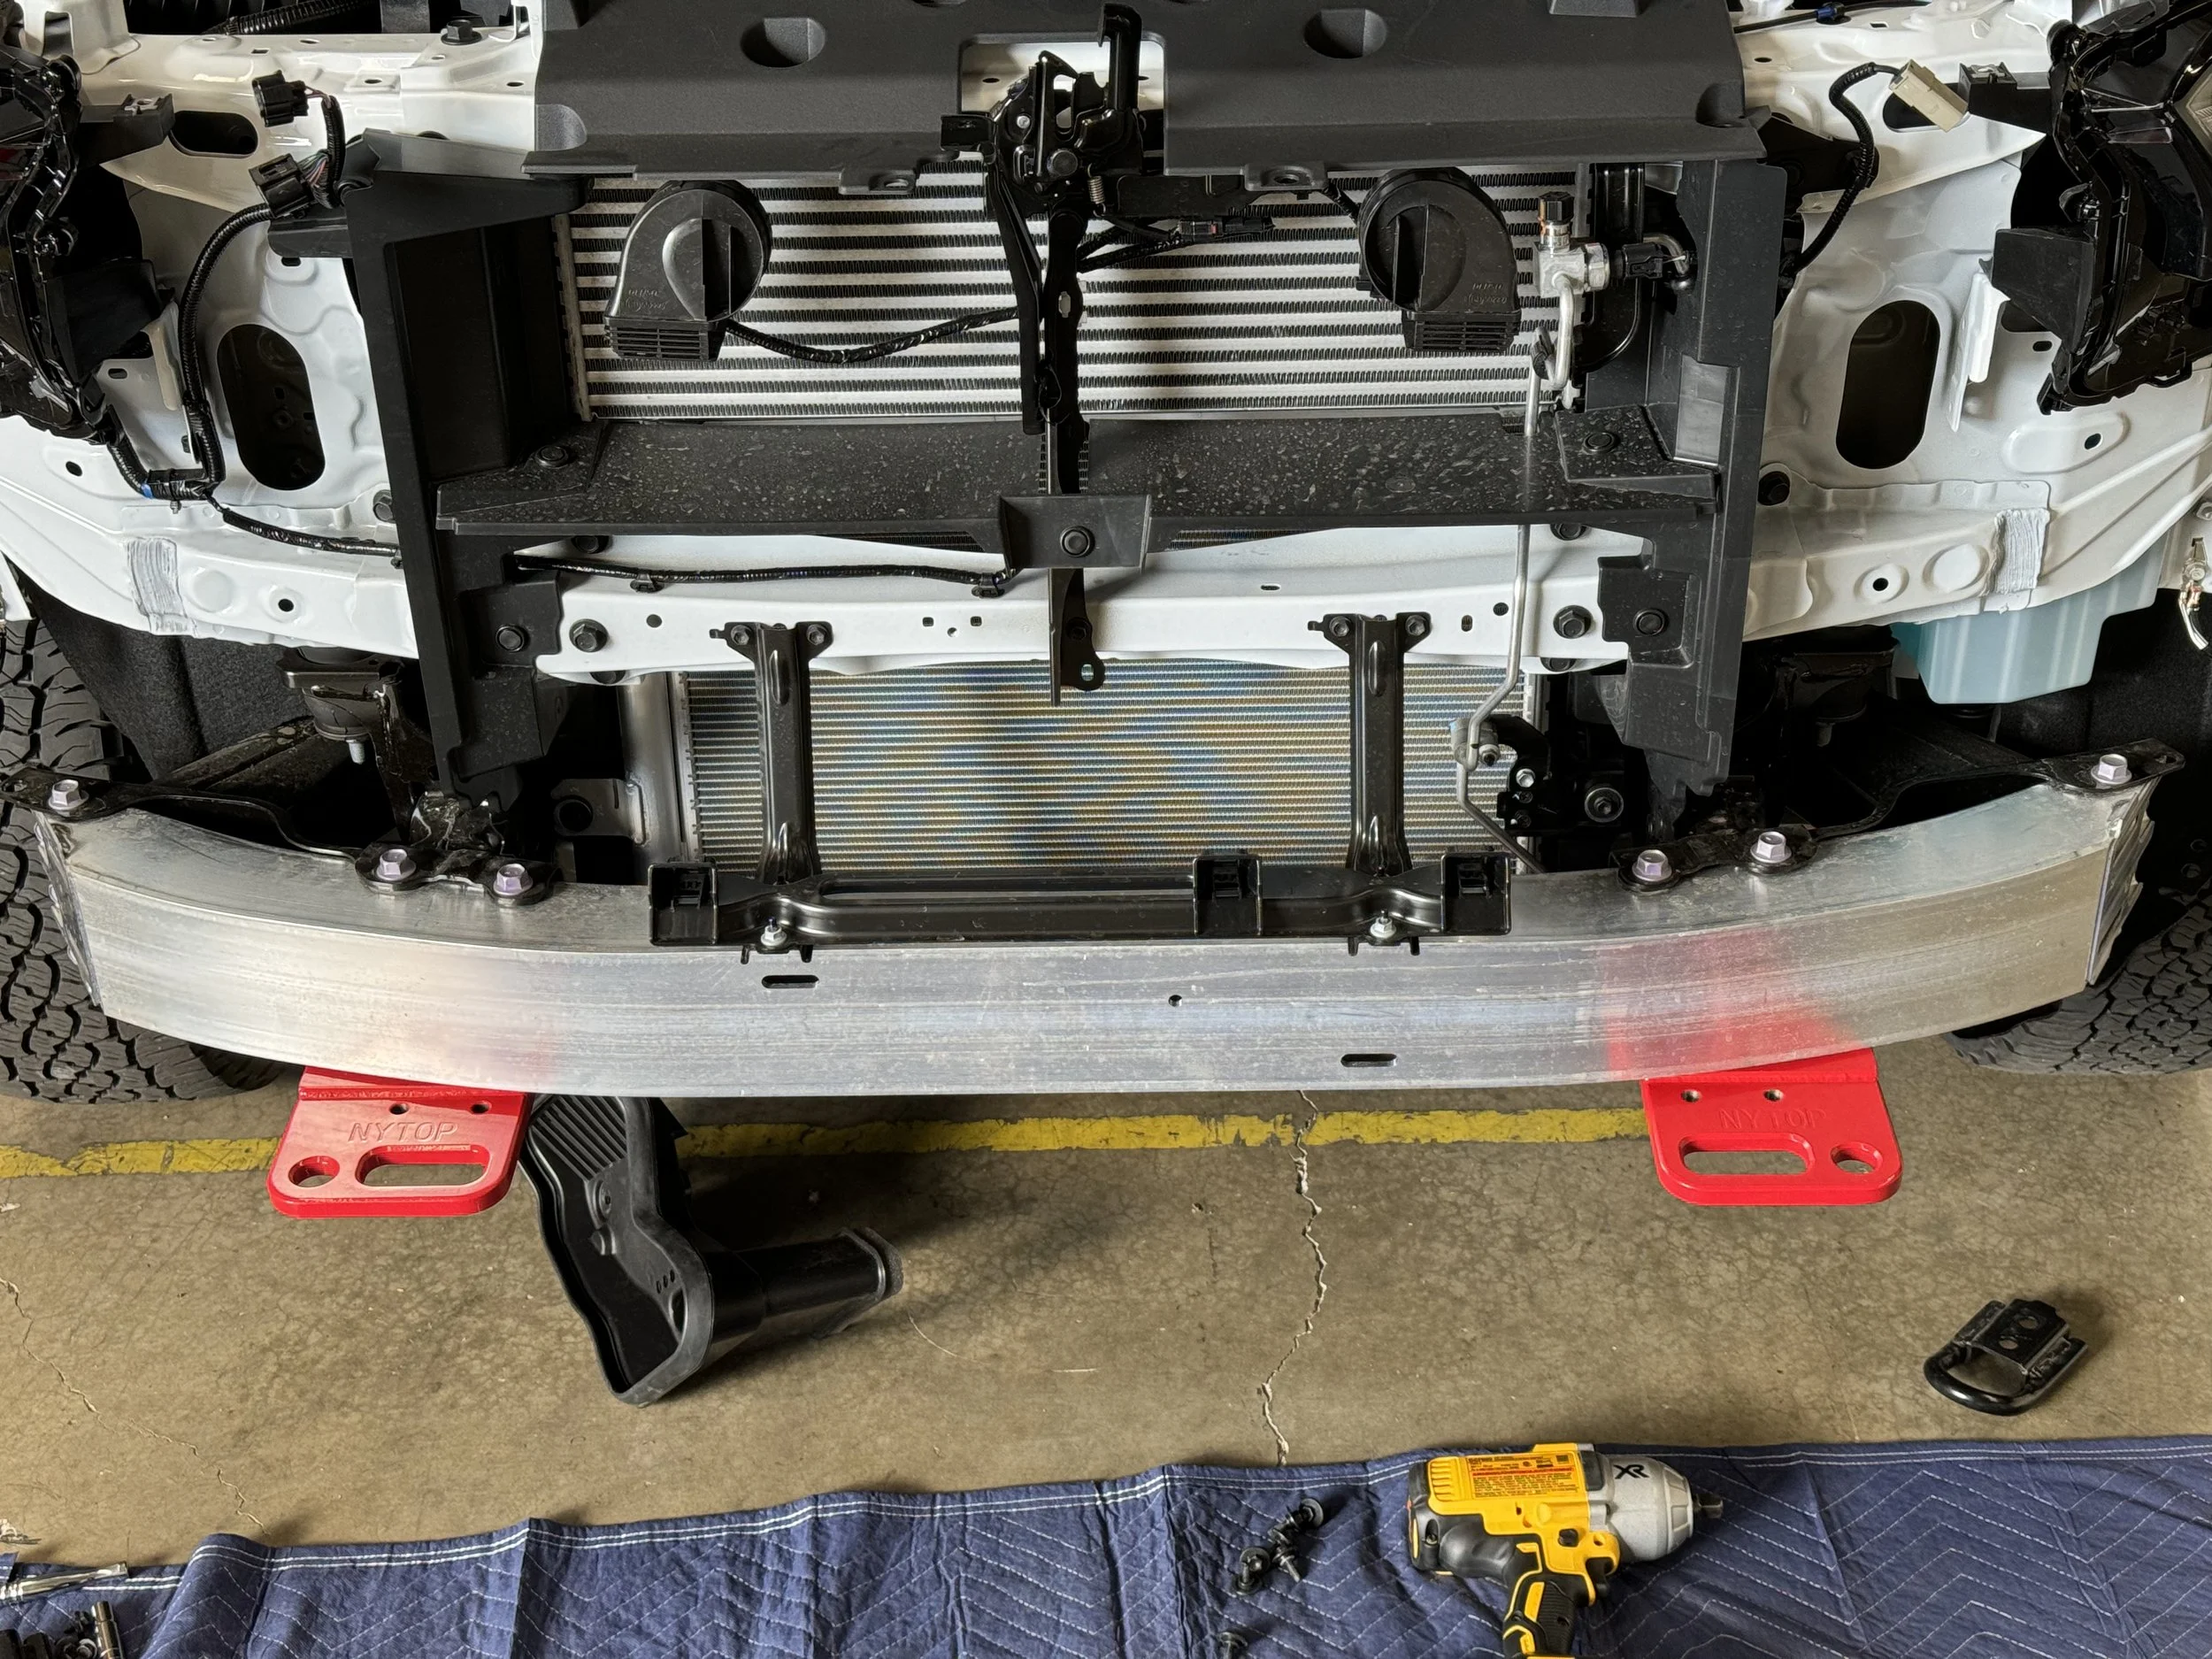
Remove the 2 M10 and 2 M12 bolts on each bottom side of the crash bar, as well as the front tow hooks on each side. You will not need the OEM tow hooks anymore.
Remove the plastic crash bar cover held on by clips (optional).


Install the two front recovery points with the factory bolts. Note that the two M12 bolts with washers on them are for the lower recovery point bolt locations.
Torque down the M10 bolts (the 2 smaller bolts) to 35 ft-lbs./47 Nm, and the M12 bolts (the 4 larger bolts) to 75 ft-lbs./101 Nm.

Reinstall the bumper cover by reversing the previous steps. Don’t forget to plug back in the wiring harnesses.


Slide the NYTOP Hybrid Bumper onto the Recovery Points. Use the provided spacer plates if needed, to fine tune the fitment.
Install 2 of the provided M12-1.25x30 mm bolts with a washer on each side, as shown in the picture. Torque them down to 75 ft-lbs./101 Nm.

Enjoy the Recovery Points and the added protection!